Desert Online General Trading LLC
Dubai, United Arab Emirates
Desert Online General Trading LLC
Dubai, United Arab Emirates


🚀 Elevate your Pi projects with pro-grade autofocus clarity!
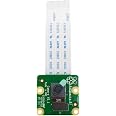
The Arducam Raspberry Pi Camera Module 3 features a 12MP IMX708 sensor delivering 4608x2592 resolution stills with HDR. Its hybrid PDAF and CDAF autofocus system ensures sharp images, while the CSI-2 2-wire serial interface enables smooth integration with Raspberry Pi 5, 4B, 3B, and Zero W/2 W models. Compatible with libcamera and Picamera2, this module is designed for developers seeking high-quality imaging and flexible software support.


| RAM | LPDDR4 |
| Wireless Type | 802.11b |
| Brand | Arducam |
| Series | Arducam for Raspberry Pi Camera Module 3, 12MP IMX708 75°(D) Autofocus Pi Camera V3 |
| Item model number | B0312 |
| Operating System | Bullseye OS |
| Item Weight | 1.27 ounces |
| Package Dimensions | 2.1 x 1.75 x 0.67 inches |
| Processor Brand | ARM |
| Number of Processors | 1 |
| Manufacturer | Arducam |
| ASIN | B0C9PYCV9S |
| Date First Available | June 29, 2023 |
A**J
Great for 3d printing timelapse’s and remote monitoring
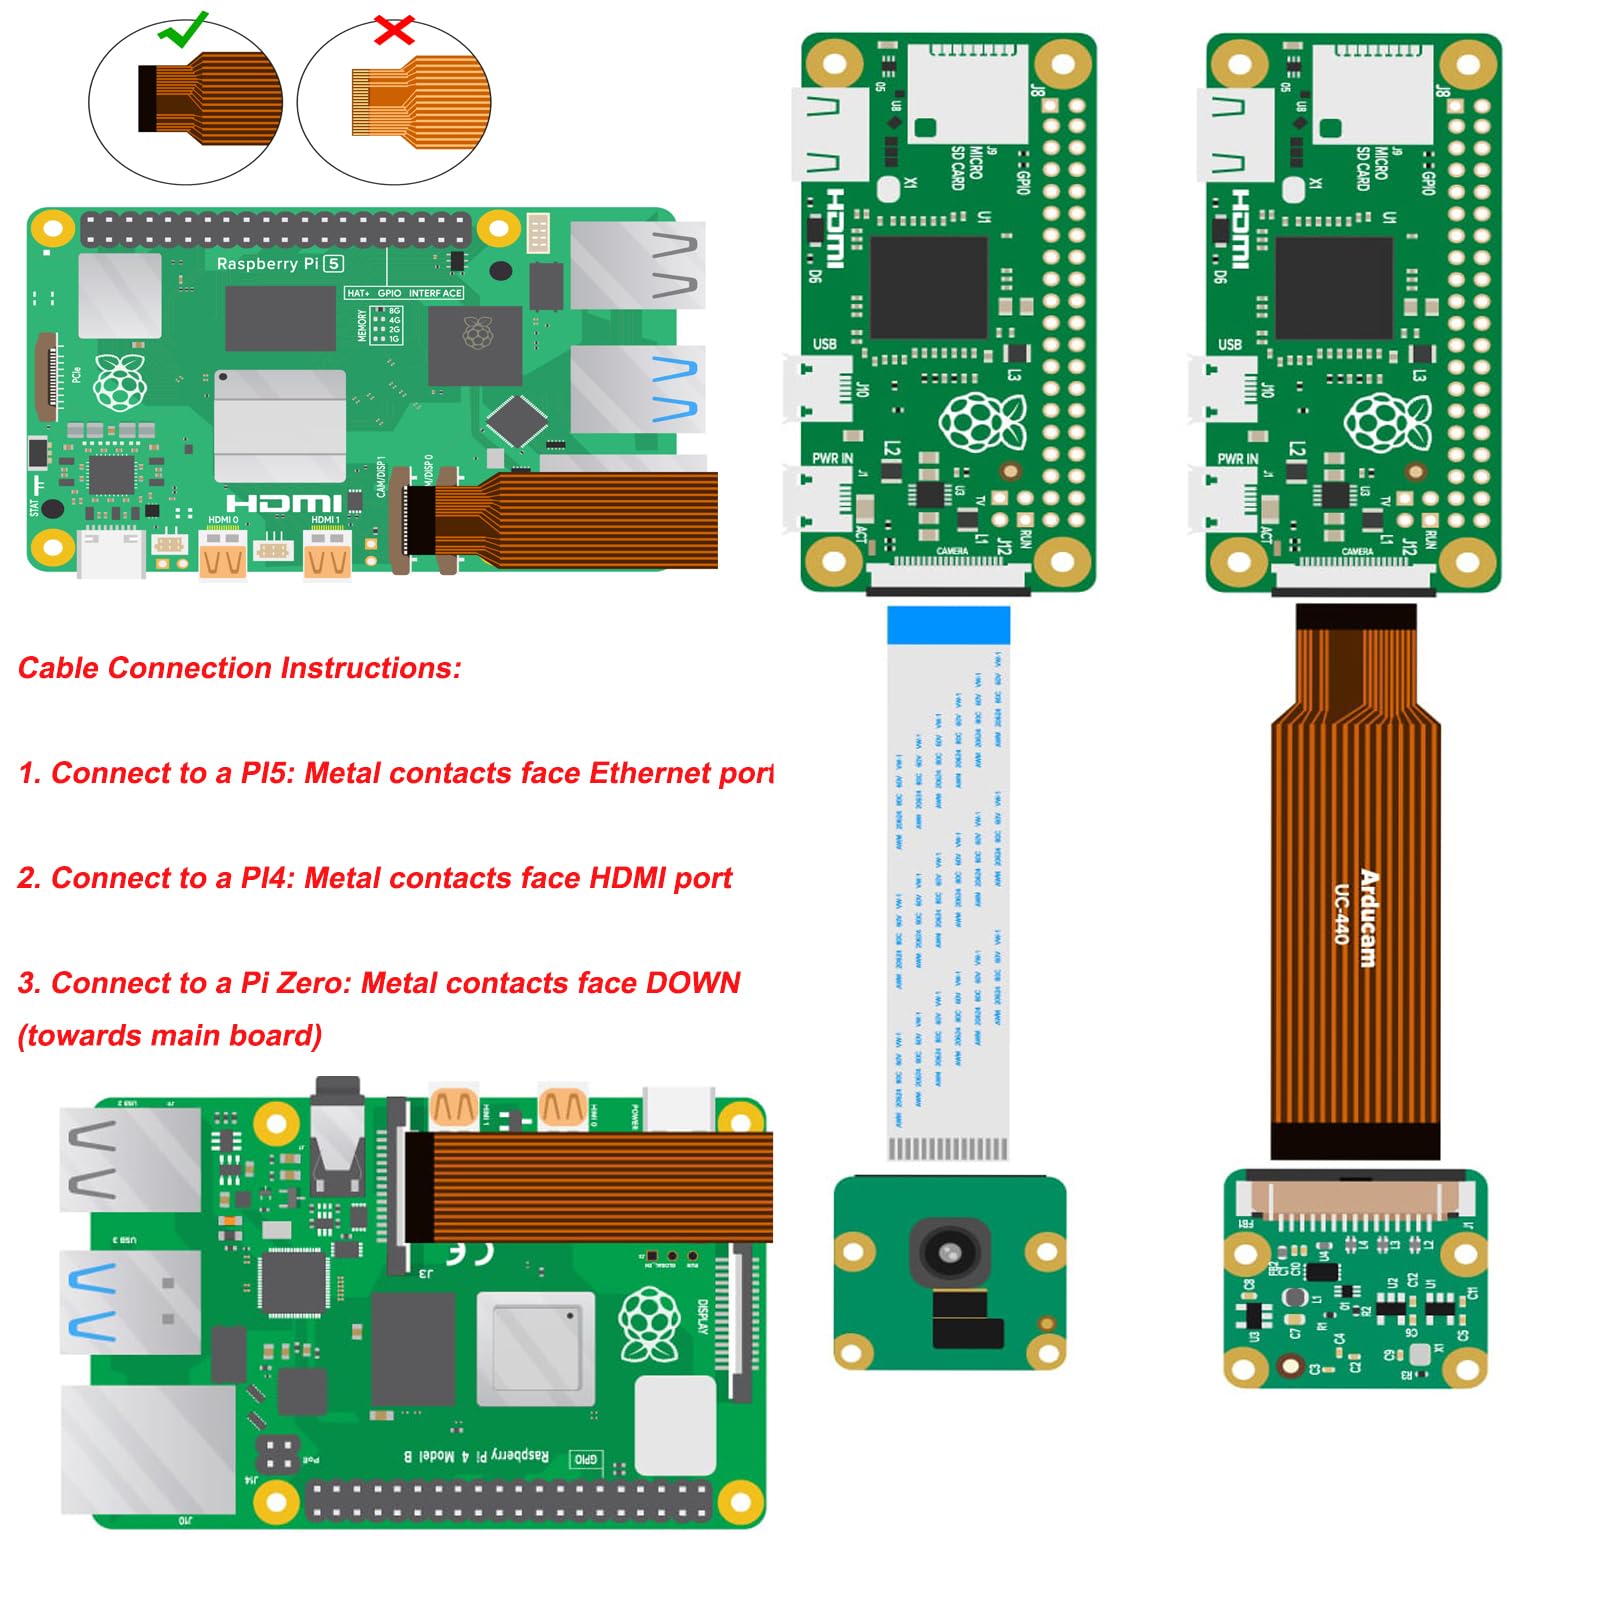
The media could not be loaded. I’ve hooked up the camera to my Raspberry Pi 4b running Octoprint. Initially I downloaded the version of OctoPi that uses the old camera stack (This camera needs the new one). However, once I figured out the problem and installed the version with the new camera stack, the camera worked perfectly and looked great. After some fine tuning of Octoprint’s camera settings and improving the rooms lighting, I was able to capture some beautiful timelapse’s! However, make sure the included cable is long enough for you — I needed a longer cable for my setup than the included one. However, I went and bought one of Arducam’s longer cables and it worked great.
B**N
Works well with headless Pi Zero 2W
Works well for a headless Pi Zero once you get it set up. As of September 2025:Hardware:Others have said it, but make sure you install the ribbon cable correctly. Black side up, pins toward the board.Software:1. Install Raspberry Pi OS Lite on your Pi Zero 22. Log in and upgrade everything: sudo apt update && sudo apt upgrade3. Install the headless version of rpicam: sudo apt install rpicam-apps-lite4. Update /boot/firmware/config.txt:camera_auto_detect=0 # Change from 1[all]dtoverlay=imx708 # Add this5. RebootTest:1. Run `rpicam-hello --list-cameras` and you should see this:0 : imx708 [4608x2592 10-bit RGGB] (/base/soc/i2c0mux/i2c@1/imx708@1a)Modes: 'SRGGB10_CSI2P' : 1536x864 [120.13 fps - (768, 432)/3072x1728 crop]2304x1296 [56.03 fps - (0, 0)/4608x2592 crop]4608x2592 [14.35 fps - (0, 0)/4608x2592 crop]2. Capture a test image like this: rpicam-jpeg -o test.jpgGood luck!
A**R
Incorrect cable installation directions, otherwise easy to setup and use. Nice picture.
I got it to work on a Pi Zero 2 W. The software directions were correct, I had to make the 2 changes in the firmware config file like they said and restart the pi. I also needed to enable I2C (which is not mentioned, and can be done via raspi-config). The camera auto focuses well, and has a fairly nice clear picture. The only reason I didn't give it a 5 star is because the directions for physically connecting the camera are not correct. It shows it using the large included cable (with the larger end on their camera) and the smaller end on the Pi Zero 2. You actually need to use the thinner cable that comes with it. The way the photo shows the cable being attached is also incorrect. The cable is backwards on one of the connections (I don't remember which), so if you get the "No Cameras Available" error, try flipping the cable at each end (one at a time), restart the pi and try again.Other than the directions for the cable not being correct, it was very easy to setup. I didn't have to install any drivers or software.
K**D
Great customer service!
ArduCAM makes some truly excellent products—reliable, innovative, and perfect for embedded vision projects. I’ve used several of their camera modules, and they’ve consistently performed well beyond expectations.Recently, I ran into an issue and got tired of waiting around for answers on online forums. So, I looked up their service phone number (which, honestly, should be much easier to find on their website) and gave them a call.I’m really glad I did. The representative I spoke with was super nice, knowledgeable, and incredibly helpful. They took the time to understand my problem and walked me through a solution that actually worked. It was such a relief to finally get the support I needed, especially after feeling stuck.If you’re using ArduCAM products and ever need help, I highly recommend calling them directly. Just be prepared to dig around a bit for that phone number—it’s worth it.
M**.
Nightmare to setup on RaspPi 3B with newest OctoPi
UPDATE:The seller reached out to offer a refund. Thank you.I did not accept their offer because I did a LOT of research and testing and finally found a configuration that (barely) works on a Raspberry Pi 3B. Upgraded to 3 stars because it works but involved much more work than was expected because the product description page on the vendor website does not provide sufficient detail. Sure. It shows how to configure and get the camera _detected_, but from there you're pretty much on your own. ffmpeg, libcamera-vid, and ustreamer were used in my final solution.Frame rate is only 6 FPS at 1024x576, but that's good enough for what I need at the moment on my 3D printer. Auto-Focus is working now with some custom options on the command line, but it took a while to find that info.I do not recommend this for a Raspberry Pi 3B because it really does not have enough CPU at 1.2GHz to run this camera at a decent resolution and frame rate. It would probably work great for stills, but not for 12MP video! I haven't tested with a 4B (1.8GHz) or 5 (2.4GHz turbo) yet, but I expect they would perform significantly better.ORIGINAL REVIEW:While the camera sensor itself outputs RAW10, the output format from the IMX708 plugin is YUYV and is not easy to setup with common tools which use MJPEG. As such, it is not easily compatible with most tools. Even with LLM AI "help", it took me over two full days to get an almost working camera. I still can't get it to focus on my print bed. In my case, it's not worth the money because of the excessive time I've put into it so far. I do *not* recommend this camera for a beginner. It's a LOT of work to get setup.
P**.
Better than the official RPI V3 camera
At the same price point as the RPI V3 camera, Arducam's IMX708 is a no-brainer as you get the same functionality as the official RPI module, with two additional MIPI lanes. The extra two MIPI lanes allow you to achieve higher frame rates when compared to the RPI module, as you have more bandwidth to push camera data through. In my testing, I've successfully pushed the frame rate at max resolution up to 45fps on the Pi5 with some overclocking fun, while normal operation sits at 30fps!This module is plug and play and comes with both a 22->15pin cable and a 22->22pin cable, allowing it to work with all Pi models!
ترست بايلوت
منذ أسبوعين
منذ شهر