


💥 Elevate Your Gaming Experience with ID-COOLING!
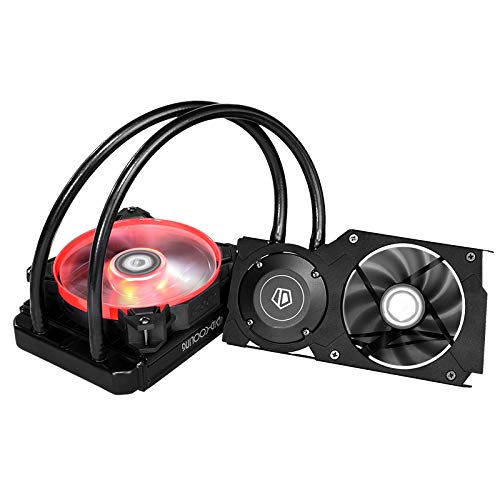
The ID-COOLING FROSTFLOW 120 VGA Graphic Card Cooler is a high-performance AIO liquid cooler designed for a range of graphics cards, including RTX2070/2080/2080Ti and 5700/5700XT series. Featuring a 120mm radiator and dual fans, it offers exceptional heat dissipation and quiet operation, ensuring your GPU runs at optimal performance while extending its lifespan.
C**R
Absurd performance-per-dollar
I've been using an aging ASUS Turbo GTX 1080 for the past couple of years. I got this card for free in exchange for fixing a friend's truck and despite swapping out the thermal paste last year, it's always been a pretty toasty card. It would average 77-80 degrees celcius, often topping out at 84 degrees before it would begin throttling. Increasing fan curves to curtail this would result a distracting level of fan noise unless I was wearing headphones. I was looking into aftermarket air coolers such as those by Arctic and Raijintek when this one came across my feed. Not only was this cheaper than the other two options, it was in stock. Despite the (to me) unknown brand, it also had a score of good reviews.I wasn't sure if it would work with my card. I know the 1080 is on the list, but my exact model wasn't. My card uses a PCM that is similar, but not identical, to the FE series 1080. However, when comparing pictures of the two PCB's, I felt the differences were minor enough to be worth taking a $70 gamble.I'll note upfront that I did not use the included fan, as I simply repurposed the Deepcool CF120 that was acting as my rear exhaust, in order to maintain visual consistency in my build. I also painted the bracket for the same reason. The bracket comes off with 8 screws, so that was pleasantly easy. I also used my own thermal paste, as I recently replaced my CPU paste with some Thermal Grizzy Kryonaut (great stuff) and had some left over. I also used some different MOSFET heatsinks for the smaller mosfets on my PCB. However, the included heatsinks and adhesive squares that came with this kit were plentiful enough that I could have used them instead of the separate units. I did use the included heatsinks on my full size VRAM chips, however, and they seem to be performing admirably and the adhesive held secure once I let it sit for a minute.Something of note on this cooler: Neither the pump nor the PCB fan are 4-pin PWM controllable. They are both 3-pin and will run at full tilt all the time. Thankfully, they are surprisingly quiet. If you want to use the fan header on the PCB, you will need an adapter that this kit does not include. Personally, I feel it would be pointless with the included pump or fan, since they are not PWM anyway. If you plan on using a different 92mm fan to cool the PCB itself, then use your discretion on whether or not you will need or want said adapter. I personally am fine with them operating as 3-pin, since they are quite quiet in my case. The only thing I have to get used to is my GPU fan speed reading 0 rpm in all of my software.The bracket itself is also not that long, so be aware you will likely have some exposed PCB, especially if your card is mounted vertically like mine. I personally think this looks pretty cool, so I don't mind it, but your mileage may vary. I do, however, wish the lighting color on the pump cap could be changed. At least white is a nice neutral color and it wouldn't really be all that visible in a typical horizontal configuration anyway, so I can't fault them too much. I can always just make a thin red diffuser myself and install it inside the pump cap.The tubing is not braided, however it is sturdy and smooth and does not kink easily. The length provided is generous enough for most builds. In my situation, I wish it was a little shorter, but then again I brought that on myself by choosing to mount it vertically. I can't comment on the fan, as I didn't use it and it immediately went into my overflowing 'spare fan' box. On initial impressions upon handling it...it's a fan. It's not loose, wobbly, rickety, or fragile in the hands. I'd say it's "fine" on pretty much every metric imaginable from what little bit of examining of it that I did.The instructions could be better, but they get the job done. They're pretty much par for the course with many cooling products these days, so I'm not going to knock stars off for them not being life-alteringly good. Overall, it's the standard affair of dismantling the GPU down to the bare PCB, cleaning off the old thermal paste, check the holes and choose the bracket mounting locations and bracket style, attach the bracket to the block, remove the protective film on the block, apply thermal paste to the GPU chiplet, attach the block and screw it down, then route your fan cables. Once the GPU is dismantled, it's just like any other AIO out there.Now, onto the meat and potatoes: Performance. First and foremost, the Deepcool CF120 fan that I have installed on the radiator is not a static-pressure fan. It is a hybrid fan with a middling static pressure rating of 1.63mmH₂O, but I like said fans because they're quiet, they move enough air for my needs, they're affordable, and they look nice.Even with an unoptimized fan on the radiator, set as rear exhaust pushing air through the radiator, I am absolutely floored by the temperature difference. As soon as I booted the system up and verified everything was reading correctly, I set up a fan curve for the radiator fan using some software to link it to GPU temp. I based this off of my old GPU temps, with a linear curve starting at 40% at =<30 degrees, with fan speed maxing out at 80 degrees.Fan speed has never exceeded 75% because my GPU doesn't get hot enough. As soon as I set the fan curves, I fired up Borderlands 3 at 1440p on Badass settings overlooking Eden 6 with the framerate unlocked. GPU instantly pegged at 99%. I then left to run some errands. I came back an hour and a half later and checked HWinfo64. GPU maxed out at 56 degrees and no higher. I figured, maybe the game wasn't pushing it hard enough, despite the utilization being pegged. So I decided to open up MSI Afterburner and run the OC Scanner, just to see what it would do. It gave me a nice 180mhz overclock, so I shrugged and said "Okay, why not?" and fired up OCCT to run the GPU stress test. 45 minutes later: 56 degrees max. An hour of Superposition? 56 degrees max. So, I go back to Borderlands 3 and play for a while. Then Destiny 2. Then COD: Warzone. I was averaging 44 degrees, topping out at 56 degrees. As I sit here tapping away and writing this, it's idling at 34 degrees. It used to idle in the 50's..That is a 28 degree reduction in peak temperatures and a 16 degree reduction in idle temperatures- With only a 120mm radiator. All while being so, so, so much quieter than my original blower-style shroud. Thermal Grizzly Kryonaut only made a 3 degree difference in my 3700X's CPU temps, so if we adjust for that, that's still 25 degrees and 13 degrees respectively on the GPU. I'm not adjusting for the fan because, again, my Deepcool fan is not designed to be used on radiators. And those readings are on the core, so the VRAM and MOSFET heatsinks don't come into play either. Those temps were never an issue and they're even less of an issue now with the improved airflow.For a ~25 degree reduction in peak temperatures, for $70, I have literally no reason to knock off any stars for this product. I performs on par with the Kraken G12 plus an M22 AIO, but for $30-$45 less.
N**N
Great base, would reccomend buying other parts to pair with. EVGA RTX 2080ti Black ( 2 - fan )
The installation was easy, but it does take time if you don't have an extra set of hands.For the EVGA 2080ti Black edition, you will need to remove the back plate, however, if you keep the gray strips of adhesive that come on the black plate, you can easily lay it back on top in the case. Alternatively, you can use the same screws and screw it back into place. Do note, that 4 of the backplate holes are used for the RTX brackets.I did order adhesive tape (XFasten Thermal Double-Sided Adhesive Tape, 1 Inch x 90 Feet, $7.99) to use instead of the tape that comes with the kit. The tape that comes with the kit is not super sticky, so I would recommend buying different tape.I originally was going to use different heat sinks, however, my box came with aluminum ones that worked great. When installing the pump, you will need to move around some of the heatsinks to avoid obstruction. It's not terrible, and doesn't affect the heat from what I've seen.I did use Arctic MX-4 thermal paste instead of the paste that comes with the kit. I would recommend using a better brand, they are pretty cheap to get. I used a thermal paste spreader instead of the "pea" method to ensure full coverage.It's not required, however, I did order a NOCTUA NF-A9x14 HS-PWM fan (92mm) to replace the one that attaches to the GPU (this fan will fit into the slot of the original one). I also did order a NOCTUA NF-F12 iPPC-2000 PWM fan as well to mount on the radiator. They have a better static pressure airflow, meaning better cooling.Now, for the performance, FANTASTIC! To start out, my case is the DarkFlash Phantom. The RTX 2080 ti would reach 84C when under load. With this cooler, I haven't seen anything above 54C. Idle temp is around 29-31C.I play on a 1440p 165hz monitor as well.Battlefield 5 Ultra - cap at 100FPS - 54C maxDestroy All Humans Ultra - cap at 60FPS - 44C maxHeaven Benchmark Ultra - Ran for 1 hour straight - cap at 51C.This product is great so far. I keep the fans at 100% on both the GPU and the radiator, the noctua fans hardly make any noise, sounds like a normal PC with fans.My total investment in this was still cheaper than the NZXT G12 bracket + an AIO and my cooling in phenomenal now.If you have any questions, I'll try my best to answer them.
A**R
Decent, but you get what you pay for.
I bought 2 of these. 1 is on a GTX1080 FE, the other is on an Asus RTX2060 Turbo in another PC. (Though not listed as supported, it fit the Asus 2060 fine with the included RTX brackets.)In the case of both cards, the coolers have done their job thermally. Both cards were running in the high 70 to low 80 degree C range under load. Even with heavy overclocks, neither gets out of the 60’s under load now. Idle temps are down as well. Installation was also straighten forward and easy for both cards.You get what you pay for though. The included fans are OK at best, and are 3-pin without PWM. They are somewhat quiet, but don’t move much air. I replaced both with Noctuas, which are both quieter and have dropped temperature several degrees further. It’s a bit of a stretch to put $40 worth of fans on a $67 AIO, but I value noise and performance a lot.The biggest complaint I have is the pump. It is rather loud, even with the voltage reduced via a fan controller. I don’t know what standards people calling it quiet have, but it is by far the loudest thing in both of the computers I installed it in. Even in a build with 14 fans, I can hear it over the fans.If I were to do it again, I’d buy the NZXT G12 bracket and a decent AIO. For half the price though, it’s hard to complain too much about this guy. If the pump wasn’t so loud, I’d easily give it five stars.***Update***I installed a Noctua 3-pin low noise adapter on the pump. Quieted it down substantially and has had no impact on thermal performance.
Trustpilot
3 weeks ago
1 month ago