🚀 Elevate Your 3D Printing Game!
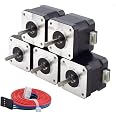
The Teyleten Robot TMC2209 V2.0 Stepper Motor Driver is a cutting-edge solution for 3D printing enthusiasts, featuring the new original German TMC2209-TA chip for exceptional silent operation, a robust 2.5A output, and a wide input voltage range of 5.5V to 28V. Its large heat sink ensures efficient heat dissipation, while the sensorless feedback function enhances precision, making it a perfect upgrade for your Nano SKR V1.3/1.4 or Ender 3 control board.
J**R
These work GREAT on my Anycubic Chiron...
I had to adjust the VREF for each. I put x, and both z's at 1v and then the y at 1.15 and the extruder at 1.2. runs smooth, quiet and cool to the touch. I am not running klipper, because there isnt a whole lot of advantage on this massive printer. The gains in speed are negated by the weight of the bed and gantry, and most other features you can get in marlin. So, I run standalone and Marlin 2.x
S**R
ATTENTION ANYCUBIC MEGA X USERS - THIS REVIEW IS FOR YOU
The media could not be loaded. I bought these drivers as a swap in for my ANYCUBIC Mega X's stock stepper drivers because the stock drivers are super loud.Like many 3D printing hobbyist, I YouTubed how to install them but these general videos will not help you with these specific drivers beyond a certain point.Key points that will remain the same for those videos and these drivers:1) You have to disconnect your stepper motors from the board, pull the plastic input housing off the pins and flip it 180 degrees. Reinsert this housing on the pins. Then flip your cables over and plug them in like that.2) When adjusting VREF with a multimeter on each driver's potentiometer, each one should be between 1.1V and 1.2V. I did 1.1V for every stepper except the extruder (E0). For that one, I did 1.2V based off of a wealth of research.Okay, that's where the similarities between these drivers and the instructional videos end.The product description says UART or Direct Step are both driver setting options. This is not the case if you have an ANYCUBIC Trigorilla board in your printer because the ability to adjust steps manually does not exist on those boards and is defaulted to 16 steps.So what does that mean?It means if you install them as is in UART mode, your axises will be a hot mess express. My Y axis kept going all the way forward or backwards and just grinding there. My X axis wouldn't move at all. Only my Z axis worked correctly.I scoured forums, videos, and Facebook groups for help and finally found someone who was patient enough to help me figure this out.Basically, to turn UART off and set the driver to direct step mode (which is the mode you need for these printers that use Trigorilla boards) you need to bend 3 pins all the way sideways so they do not insert into the board. (please see attached photos for reference).If you look at one of these 2209 drivers straight on with the 3 copper circles being the top (yellow pins should be on the right), you're going to bend flat out to the side the 3rd, 4th, and 5th pins on the right side.This turns UART off and converts this into a direct step driver. Now you can carry on without the 5+ hours of troubleshooting and confusion that I endured.This process works fine with stock firmware and Knutwurst. I don't run Octoprint or Klipper, but I'd imagine it'd work for those too.Once I'd done this to all 5 stepper motors and turned the printer off and back on, the axises corrected themselves and now all home appropriately with no grinding.Happy Printing!
A**C
Good Stepper Drivers at a Great Price
I was a little hesitant to order these as they were pretty significantly cheaper than some of the more known brands and had no reviews, but decided to take a chance and I'm glad I did. As seen in the picture, the chip is a TMC2209, not a 2208 like I feared I might get for the price. The board is mostly unlabeled, but the pinout is in the pictures in the product listing and the enable pin is labeled. I currently have them running in standalone mode on a 3d printer (AnyCubic Chiron). I did adjust the Vref before using them as it was not at the value I needed out of the package. The heatsink is nice and large and they really quiet down the printer. I swapped them in for some A4988 drivers and I did have to reverse the motor direction in firmware, but I've also read you can just reverse the motor wire connection also. It is important to note that compared to an A4988, the enable pin needs to. E lined up in the same place, which makes it look like the drivers are reversed compared to the old ones. Unfortunately none of my other printers have removable stepper drivers, but I wouldn't hesitate to buy more of them if I ever blow a driver.
B**E
:(
The first 3 out 5 were junk, so I'm not even checking the other 2.1 - Had the little resistors and capacitors falling off out of the bag. (Poor durability)2 - Rewired everything 3 times based on the diagrams, and it would still kill my Arduino. (Bad internal circuitry)3 - Using the same wiring and dropping in #3, the issues with #2 didn't occur, but I couldn't get the step pin to work. Adjusted frequency, the current flow, etc. to no success on turning my stepper. (Bad internal circuitry)Got the 5 pack because I needed 3 good ones and anticipated at least 1 failure. Now I don't trust the other 2 even if they work, so I'm just going to use a different driver.
G**S
Works great for my 3D Printer
Upgraded my Prusa MK 2.5S with these drivers, they are really the game changer. My printer is now super quiet and runs smoothly. I used for all XYZE motors with a driver breakout from Custom Circuit Co. in Sweden. Runs well with 24 VDC.
D**D
Used on my MKS GEN L V3
Perfect for my MKS board to control steppers. None of my stepper motors were over heated or made any unusual noise .. Works my 3D printer (TEVO TORNADO) perfectly
D**G
Great Driver with PCB Size Issue
I’ll start off by saying that the drivers perform well and seem to function perfectly. The issue I ran into is the sizing of the PCBs. I installed these on a BTT Octopus board and was running into an issue where the PCBs were interfering with each other and making it difficult to install them. It’s kind of hard to tell, but you should should be able to see that in the pictures.The price for these is great compared to other brands. If the PCB sizing issue is QC’d a bit better, these would easily be a 5/5.
S**N
quiet!
It really quite surprising how much quieter a stepper motor will run with a good driver!!! Used in a custom project with ESP32 WROOM.
Trustpilot
1 week ago
5 days ago