Label Your World with Style! 🎨
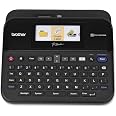
The Brother P-touch Label Maker PTD600 combines a smart compact design with a high-resolution color display, allowing you to create professional labels effortlessly. With PC and MAC compatibility, this labeler offers versatile functionality for both home and office use. Its portable design ensures you can label on the go, making it an essential tool for any organized professional.


| Maximum Print Resolution Black and White | 400 dpi |
| Is Electric | Yes |
| Duplex | Automatic |
| Dual-sided printing | Yes |
| Color | Black/gray |
| Maximum Sheet Capacity | 1 |
| Media Size Maximum | Paper Roll |
| B&W Pages per Minute | 1 |
| Color Pages per Minute | 1 |
| Total USB 2.0 Ports | 1 |
| Total Usb Ports | 1 |
| Hardware Connectivity | USB |
| Connectivity Technology | USB |
| Ink Color | Multiple (black, red, blue, etc.) |
| Warranty Type | limited warranty |
| Control Method | Touch |
| Controller Type | iOS |
| Print media | Labels |
| Display Type | LCD |
| Compatible Devices | PC, Mac |
| Printer Type | Thermal |
| Additional Features | Internal Memory, Display Screen |
| Printer Output Type | Monochrome |
| Item Weight | 2.1 Pounds |
| Item Dimensions D x W x H | 7.6"D x 7.9"W x 3.4"H |
W**O
Good Replacement for Older Ptouch Label Maker
Brother at least for MacOS drivers, obsoletes the driver and with it the supported label maker. Thus I have now purchased three label makers not because they broke, only because Brother does not support newer operating systems. Note this does not appear to apply to Windows where Brother support is very good.This label maker requires newer label cartridges, but there are third party alternatives sold on Amazon where the results are just as good as OEM Brother label material.The label maker supports BlueTooth, though can use USB. With BlueTooth and the included AC power supply, as well as the fact that the software reads the label size from the cartridge making the label maker largely mindless to use.Note there is a minimum length of the label with the internal cutter. For smaller label lengths, cutting the labels by hand is required.
E**N
WOW I love this machine!
I tried one of the less expensive Brother label printers, but returned it because I could not read the non-backlit LCD. It was very low contrast, and I was very disappointed. I searched for one with a backlight, and ran across this one - with an LED screen - in full color, and graphical user interface. I have to say, it is almost an Apple experience using it! Very very nice interface, once you figure it out, and extremely easy to use.I love the fact that you can have ½", ¾" and 1" tape from the same machine, and that it automatically detects the tape and the color of the tape and ink, so the display looks exactly like what you will see. With the option for close cut, you only lose about ¾" of tape for each label, which is very good.I have poor eyesight, so their thick font on 1" tape works great in my lab - I can read them without having to get up close and put on my reading glasses.In theory, the unit runs off of 6 AA batteries. However, I would say only if they are very fresh. The printer draws too much juice if the batteries are not in absolutely great condition.My first effort with the printer was a small disaster. I did not know how the cartridges worked, and the first cartridge had the tape coming out wrong (not going around the little corner). So, instead of the tape going thru the cutter and out the side of the printer, it was going back into the printer! And of course - what a mess! I managed to get the cartridge out, and remove the tape - I had the tape loop out about 6" with separated clear tape, the backing tape, and the ink tape all out in loops.So, I called Brother for help. Frankly, the guy answering the phone was of absolutely no help, and could not think - he had to follow a script. One element on the script was "Is this a genuine Brother tape?" No. Sorry, can't help you.Not what I would call great customer support. So, I went on YouTube and looked for "what is inside a Brother tape cartridge" and "how to fix a Brother tape cartridge." Once armed with that, I realized I only had to pull out the excess tape and cut it off, making sure it came out where it was supposed to. Lost about 10" of tape, no big deal, and it worked fine.While I cannot recommend their technical support, I can certainly recommend the machine! It does a fantastic job, with all of the options offered. It also can be connected to your computer as a label printer, and you can download software to make even fancier labels with that - so far, I have not needed anything I can't do right out of the machine.LED display with graphical user interface, multiple tape size support - a great product!
R**S
So glad I finally bought one!
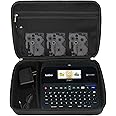
The media could not be loaded. Only wish I'd done it sooner!Folks who say it wastes tape just need to dig deeper into the options. See my video or follow these directions:1. While editing a label, Press FN to get to the menu.2. Use arrows to select Cut Option then press OK.3. Use arrows to switch between large margins, short margins, chain (which will cut with a very short margin), or no cut. Then OK.Chain won't cut your label until you print the next one. Create several of labels, then for the last label, click Shift - Feed & Cut. You'll dramatically cut down on the waste.You can also play with "length" and "justify" in the menu so it centers the text and makes the label only as long as you want it to be.So far, I've used the Brother P-Touch PTD-600 to organize my tower of plastic drawers of K9 nosework supplies for my students. I've also used them to label the metal tins, lip balm tubes, and aluminum pill holders we use to hide odor in for the dogs to find. The scent kits I send students now look much more professional.Took awhile, but I eventually figured out how to find off brand label cartridges which made it much more affordable - and I highly recommend you do the same. Frankly the brand name labels are WAY over priced.Unlike the ink jet labels I've used in the past, the ink doesn't rub off when students handle the hides with hands covered in slimmy treats and dog slobber. And I can finally print white text on clear background!Easy to get the backs off to expose the adhesive once you realize it's scored down the middle. Just gently bend the label in half and use nail to catch an edge.The P-Touch PTD-600 can be used plugged in or with 6 AA batteries. Not sure about battery life, yet.I bought a nice case separately, with plenty of room for cartridges, the cord, etc.I haven't used the Brother computer program to design labels yet - only the on board interface so far. But plan to eventually.The interface though has quite a few sample labels for various solutions, like tables and stuff.
Trustpilot
1 month ago
1 week ago